I really believe that I could never come up with an original idea, but I'm going to score myself pretty high up on the Bloom taxonomy for taking information from another purpose and inventing a new use. Let's call that "synthesis".
The 4th grade teachers in my school demonstrated a way to fold paper into booklets for students to study vocabulary etc. The key was to fold it in such a way that the booklet had different levels. I think that would work for fabric, too.
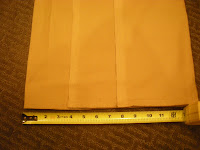
I took a left over piece of material (about 30 inches long and 45 inches wide) and finished off the edges to look clean and even. The selvage edges were already finished off, so I could use them as the inside edges of my pockets. I folded the material so the top edges were about 3 inches apart.
Flipping over the whole project, I brought the bottom edge up about 3 inches below the first edge.
So now I have the potential for two rows of pockets and clean ends (by the folds) at both the top and the bottom. Thank you, Grade 4 teachers!
I had about 2 yards of multicolored ribbon and centered it in the middle of the outside and pinned it at the edges so it wouldn't move.
Then I stitched a line on the inside of the project just above the flap. That holds the ribbon in place, but it also gives me an upper pocket and a lower pocket. You can sort of see the stitching right in the center.
Gus "helped" on this part.
Using my "considerable" math skills, I marked 2 inch increments for pocket lines.
Next, it was simply sewing straight lines where there marks were, et voila!, pockets for all of my needles!
The best part? Roll it up, tie a bow, and put it back in the craft drawer, ready for any project I can think of.
Okay, that's for the straight needles. Now, how about the circular needles? I have an idea!


this is awesome Mom!! cool project and really cute too!!!
ReplyDelete